Welcome to the world of safely cutting live wires! In this comprehensive guide, we will navigate the crucial steps and precautions to ensure you can cut live wires without exposing yourself to unnecessary risks. Electrical work demands a high level of caution, and we’re here to provide you with the knowledge and insights needed to undertake this task safely.
Understanding the potential hazards of cutting live wires is the first step to ensuring your well-being. We’ll delve into the risks, ranging from electrical shocks to fire hazards, and highlight why taking the right precautions is vital.
But fear not! Our guide doesn’t just stop at pointing out the dangers. We’ll walk you through the essential safety measures you must take before even thinking about cutting a live wire. From wearing the right gear to properly turning off the power source, our step-by-step instructions will create a safe environment for you to work in.
Understanding the Risks of Cutting Live Wires
When cutting live wires, it’s crucial to grasp the potential risks involved to ensure a safe working environment. Electricity, while a valuable resource, can pose serious threats if not handled with care. Let’s delve into the risks associated with cutting live wires and why being aware of these dangers is the first step toward a secure electrical task.
1. High Voltage Dangers
Live wires carry electrical currents, often at high voltages. The primary risk lies in the potential for electric shock. Even a small jolt can be dangerous, causing injury or, in extreme cases, fatalities. Understanding the voltage of the wire you’re dealing with is fundamental in assessing the level of risk.
2. Electrical Burns and Fires
Cutting live wires without proper precautions can lead to electrical burns. The heat generated during the cutting process can cause severe injuries. Moreover, sparks produced during cutting may ignite flammable materials in the vicinity, leading to a fire hazard. Being aware of these possibilities emphasizes the need for meticulous safety measures.
3. Arc Flash Hazards
Arc flashes, or sudden energy releases, can occur during wire cutting. These flashes emit intense heat, light, and sound, posing a severe threat to anyone nearby. Protective measures, including proper clothing and eyewear, become essential to mitigate the risk of arc flashes.
4. Electrocution Risks
Electrocution is a severe risk when cutting live wires. This occurs when the electric current passes through the body, potentially affecting the heart and other vital organs. Understanding the pathways through which current can flow, such as the hands-to-heart path, highlights the importance of proper handling techniques and safety precautions.
5. Unintended Consequences
Cutting live wires without a clear understanding of the electrical system can lead to unintended consequences. This may include disrupting power to essential appliances, affecting nearby electrical circuits, or even damaging the overall electrical infrastructure. Recognizing the potential repercussions emphasizes the need for a well-thought-out approach.
6. Importance of Safety Gear
One of the key elements in mitigating these risks is the use of appropriate safety gear. Insulated gloves, eye protection, and non-conductive footwear are essential to creating a barrier between the electrician and potential hazards. Understanding safety gear’s purpose and proper usage is paramount for personal safety.
Essential Safety Precautions Before Cutting Live Wires
Before embarking on cutting live wires, it’s imperative to prioritize safety. Taking essential precautions ensures your well-being and completing the task without incident. Let’s explore the crucial safety measures that should be undertaken before even thinking about cutting a live wire.
1. Turning Off the Power Source
The first and foremost step in ensuring safety is to turn off the power source. Identify the circuit breaker or fuse box and switch off the power supply to the area where you will work. This eliminates the risk of electric shock and allows you to handle the live wires safely.
2. Confirming Power Isolation
Once the power is turned off, it’s essential to double-check and confirm that the power is effectively isolated. Use a voltage tester to ensure that the wires you are about to cut are truly de-energized. Relying solely on visual cues is insufficient; a voltage tester provides concrete verification of power isolation.
3. Wearing Insulated Gear
Protective clothing is your armor when dealing with live wires. Insulated gloves, eye protection, and non-conductive footwear create a barrier between you and potential electrical hazards. Ensure your safety gear is in good condition and meets industry standards for adequate protection.
4. Using Insulated Tools
Just as your clothing provides protection, your tools should do the same. Ensure that all cutting tools used are insulated and designed for electrical work. Insulated pliers and wire cutters are particularly crucial. This extra layer of insulation minimizes the risk of electrical conductivity through the tools.
5. Maintaining a Dry Environment
Water and electricity don’t mix well. Before cutting live wires, ensure the work environment is dry. Moisture increases the conductivity of electricity and heightens the risk of electric shock. If working outdoors, be mindful of weather conditions and postpone the task if rain is imminent.
6. Having a First Aid Kit On Hand
Despite all precautions, accidents can happen. Having a well-equipped first-aid kit nearby is a smart safety measure. Include items such as bandages, antiseptic wipes, and burn ointment. Being prepared to address minor injuries promptly contributes to overall safety.
7. Informing Others and Restricting Access
Communication is key when undertaking electrical work. Inform those around you about the task, and restrict access to the work area. This prevents accidental contact with live wires and reduces the likelihood of interruptions that could lead to mistakes.
8. Clearing the Work Area
A clutter-free work area is essential for safety. Remove any unnecessary tools, materials, or obstacles that could pose a tripping hazard. A clean and organized workspace reduces the risk of accidents and allows you to focus on the task.
Identifying Types of Live Wires and Their Characteristics
Understanding the different types of live wires and their unique characteristics is fundamental to safely cutting them. This section will delve into the world of cables, explaining their colors, purposes, and the electrical currents they carry. This knowledge is essential for making informed decisions and ensuring a secure environment during the wire-cutting process.
Types of Live Wires
1. Hot Wire (Live/Phase) – Color: Black or Red
Characteristics: Carries the electrical current from the power source to the appliance or device. It is crucial to identify and handle this wire with care, as cutting it without proper precautions can result in electric shock.
2. Neutral Wire – Color: White or Gray
Characteristics: Completes the electrical circuit and provides a return path for the current. While it carries current, it is not as dangerous as the hot wire. However, it’s still important to exercise caution.
3. Ground Wire – Color: Green or Bare Copper
Characteristics: Primarily a safety feature, the ground wire provides a pathway for electric current to flow safely into the ground. It helps prevent electrical fires and ensures that metal parts of electrical appliances are not electrified.
4. Traveler Wires (In Three-Way Switches) – Color: Usually Red and Black
Characteristics: Found in three-way switch circuits, these wires enable the control of a single light or electrical device from multiple locations. Identifying these wires is crucial to maintaining the functionality of the circuit.
5. Control Wires – Various Colors
Characteristics: Found in more complex electrical systems, control wires are used to transmit signals for automation or specialized functions. These wires may vary in color, and understanding their purpose is vital for proper electrical work.
How to Identify Them?
Color Coding
Hot wires are typically black or red.
Neutral wires are usually white or gray.
Ground wires are green or bare copper.
Labeling
Wires may be labeled with tags or markings to indicate their purpose. Pay attention to any writing or symbols on the insulation.
Consulting Documentation
Blueprints, circuit diagrams, or electrical system documentation can provide valuable information about the types and functions of wires in a specific installation.
Using a Voltage Tester
Before cutting any wire, use a voltage tester to confirm its status. This additional step adds a layer of safety by ensuring that the wire is not energized.
Choosing the Right Tools for Cutting Live Wires
Selecting the appropriate tools for cutting live wires is a critical aspect of ensuring the success of the task and the safety of the individual performing it. In this section, we will guide you through choosing the right tools, emphasizing the importance of insulation and non-conductive materials.
Insulated Tools: Your First Line of Defense
1. Insulated Pliers
Purpose: Used for gripping and holding wires securely.
Characteristics: Insulated handles provide a protective barrier, preventing the transfer of electrical current to the user.
2. Insulated Wire Cutters
Purpose: Designed specifically for cutting wires cleanly and efficiently.
Characteristics: Insulated handles ensure the cutting process is conducted without the risk of electric shock.
3. Insulated Screwdrivers
Purpose: Essential for tasks involving screws and electrical components.
Characteristics: Insulated handles prevent the transmission of electrical current through the tool, safeguarding the user.
4. Insulated Tape Measure
Purpose: Measuring distances for precise installations.
Characteristics: Insulated casing prevents accidental contact with live wires during measurements.
Non-Conductive Materials: Creating a Safe Working Environment
1. Rubber Mats or Carpets
Purpose: Placed on the floor to create an additional layer of insulation.
Characteristics: Protects the user from ground currents and enhances overall safety.
2. Fiberglass Ladders
Purpose: Accessing elevated areas for electrical work.
Characteristics: Non-conductive material prevents the risk of electric shock when working at heights.
Selecting Tools Based on Task Complexity
1. Wire Strippers
Purpose: Removing insulation from wires before cutting or connecting.
Characteristics: Adjustable and insulated, ensuring precision and safety during the wire preparation.
2. Cable Cutters
Purpose: Cutting larger cables or bundles of wires.
Characteristics: Designed for efficiency and equipped with insulated handles for user protection.
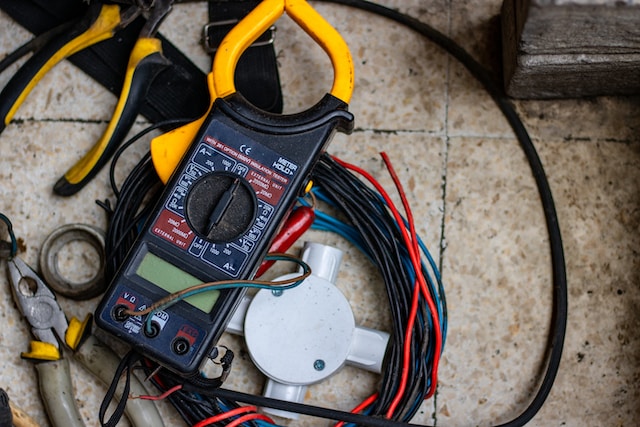
3. Voltage Tester
Purpose: Confirming the de-energization of wires before cutting.
Characteristics: A crucial tool for ensuring the wire is safe to handle, reducing the risk of electric shock.
Step-by-Step Guide to Cutting Live Wires Safely
Now, let’s dive into the heart of the matter – the step-by-step guide to cutting live wires safely. Follow these instructions diligently to ensure a secure process and minimize the risks of working on live electrical circuits.
Step 1: Power Off and Verify
Power Off the Circuit:
Identify the circuit breaker or fuse box.
Turn off the power supply to the area where you’ll be working.
Step 2: Gear Up for Safety
Wear Insulated Gear
Put on insulated gloves, eye protection, and non-conductive footwear.
Insulated gear serves as a crucial protective barrier.
Step 3: Select the Right Tools
Choose Insulated Tools
Select insulated pliers and wire cutters for the task.
Ensure that the tools are in good condition, with intact insulation.
Step 4: Identify and Prepare the Wire
Identify the Live Wire
Differentiate the live wire from neutral and ground wires based on color or labeling.
Take note of any specific markings on the wire.
Measure and Mark
Use a tape measure to measure the length you need to cut.
Mark the point on the wire where you intend to cut.
Step 5: Cut with Precision
Hold the Wire Securely
Use insulated pliers to grip the wire securely.
Maintain a firm grasp to prevent slippage during the cutting process.
Use Insulated Wire Cutters
Position the insulated wire cutters at the marked point on the wire.
Make a clean and precise cut, ensuring the tool’s insulation remains intact.
Step 6: Post-Cutting Safety Measures
Inspect the Cut
Examine the cut end of the wire to ensure it is clean and without frayed edges.
Any irregularities may require further attention.
Step 7: Post-Cutting Safety Checks
Use a Voltage Tester Again
Double-check the cut wires with a voltage tester to confirm they are still de-energized.
Ensure no unexpected changes have occurred in the electrical system.
Step 8: Clean Up and Secure the Area
Organize Tools and Materials
Put away tools in their designated places.
Keep the work area tidy and organized.
Conclusion
In conclusion, safely cutting live wires is a task that demands meticulous attention, careful planning, and a commitment to maintaining a secure work environment. Throughout this guide, we’ve navigated the essential aspects of understanding the risks, implementing safety precautions, identifying wire types, selecting the right tools, and executing the cutting process step by step.
By comprehending the potential hazards associated with live wires, individuals can approach the task with a heightened awareness of the importance of safety measures. From turning off the power source and wearing insulated gear to choosing the right tools and executing precise cuts, each step plays a crucial role in minimizing risks and ensuring a successful outcome.
Moreover, the after-cutting procedures and safety checks outlined emphasize the responsibility of the individual in securing the work area, disposing of cut material safely, and verifying the overall integrity of the electrical system. These post-cutting steps contribute significantly to the completion of the task in a responsible and secure manner.


